United Kingdom
 Ireland
 Australia
 New Zealand
 Canada

Welcome to better patient marketing
Email marketing is tough. A lot of people do it badly, and you end up getting irrelevant emails in your inbox. Good marketing is relevant and useful to your patient that benefits their well-being and helps you run a healthy business.
Relevant marketing is slightly abstract but can be achieved through a process of segmentation. Segmentation is the creation of groups of patients based on different criteria. These criteria maybe the patients age, previous treatments they have had or the last time they came in for an appointment.
The segmented campaign workflow
To conduct a successful targeted email marketing campaign to your patients follow this workflow.
- Decide on the goal of the campaign, is it to inform patients? Or is to get them to come and see you? or some other goal?
- Segment you patients by specific criteria that ensures the value being proposed is relevant to the patient
- Export the list of patients and contact details for the specific target segment to a .csv from your dental software
- Open the csv in Excel process the data based on the segmentation criteria
- Import the list of patients into MailChimp
- Design an email that contains relevant copy and a call to action for the recipient
- Send the email and track its effectiveness
- Experiment with campaign offers, patient segments and learn from what works and what doesn't
An example with a walkthrough
This is a guided tutorial on how to send a targeted email campaign to your patients, it will take 10 mins. I know 10 mins seems long but targeted email campaigns are awesome so you should totally learn how to do it. Oh and you can do it for free! We will use MailChimp which is an awesome bit of cloud software that let's you run email campaigns for free!
The situation
You notice that young professionals, ages 25 - 29 (for example) are not visiting you enough, you want them to come in more.
The campaign goal
You want patients who are 25 to 29 year olds that have not visited you in the last year to come in for a checkup. The value proposition that you make to your patients is that they can come in for a free check up, to ensure their oral health is up to standard and they are looking after themselves. The business case for this is that you will engage patients that will require further treatment through this promotion that will be payed for.
Patient Segmentation

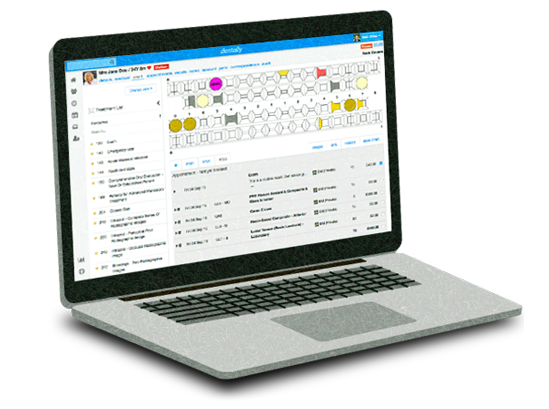
To segment your patients we need to use the reporting feature of your practice management dental software. I'll be doing it in Dentally for this example. Go to the Reports section and use the Lapsed Patient report. At the top-left of the window set the data for a year or two ago so this will be January 2015 (as I'm writing in January 2017!). This will then generate a list of patients that haven't seen you for a year. Click export in the top-right and download the CSV.
Next we are going to find the patients we need. Open the CSV in Excel, and select the patient's date of birth column. Right-click and format the column as 'Date'. Sort the column so that the dates are in order. We want to keep patients born in the years 1989 to 1986, and remove the rest from the spreadsheet. Next we need to only select columns first name, last name, and email address as this is the only information we need for MailChimp, do this by holding down ctrl (Windows) or cmd (Mac) and clicking the column name. Select all three columns, copy them and paste them into a new spreadsheet.
From this new spread sheet with only three columns save it as a CSV by clicking File -> Save As then select .csv as the format. We will now get MailChimp ready then import the .csv list.
Import the patient segment list into MailChimp
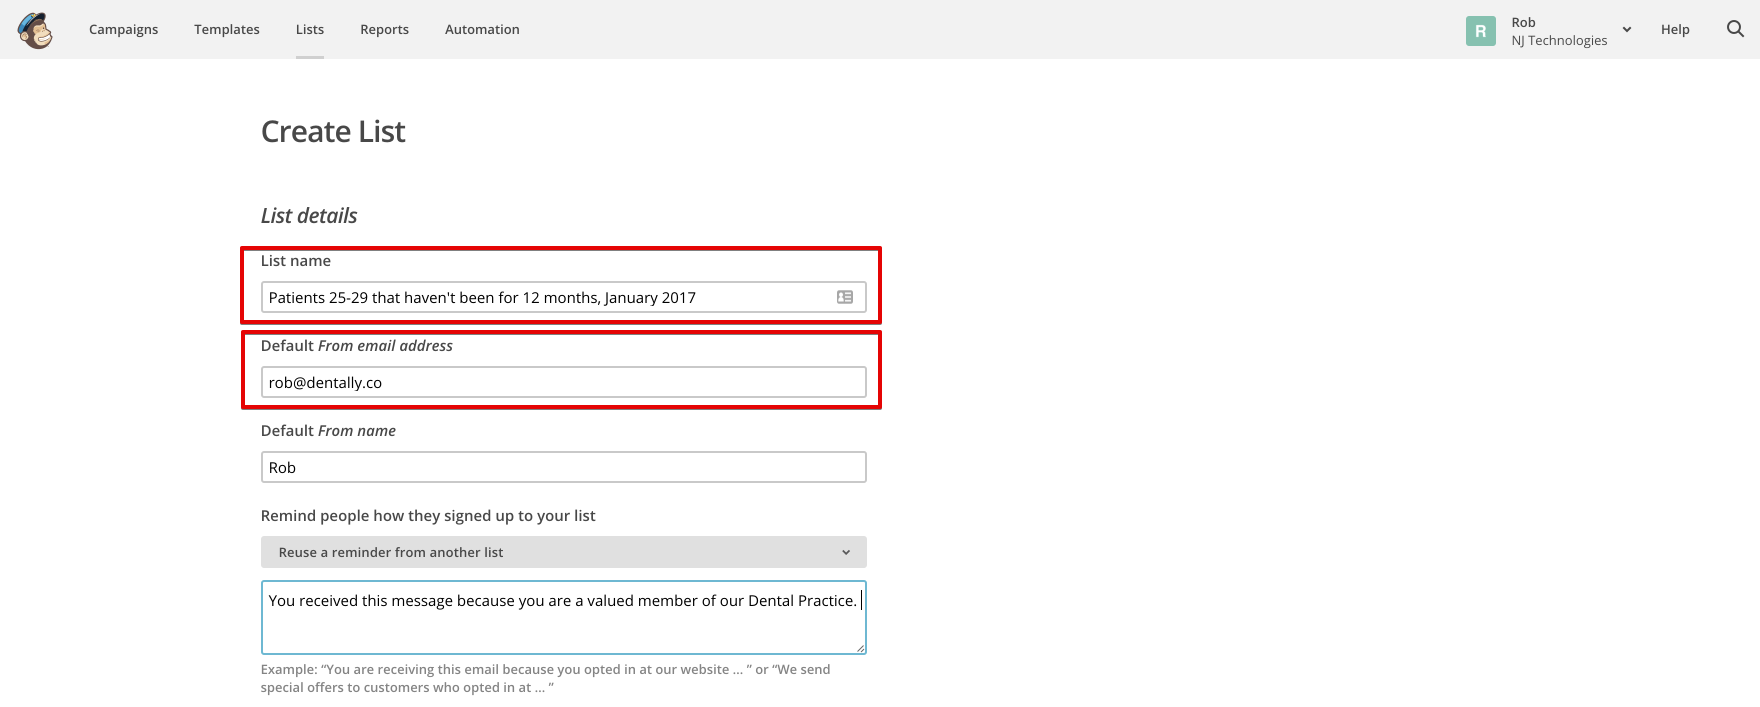
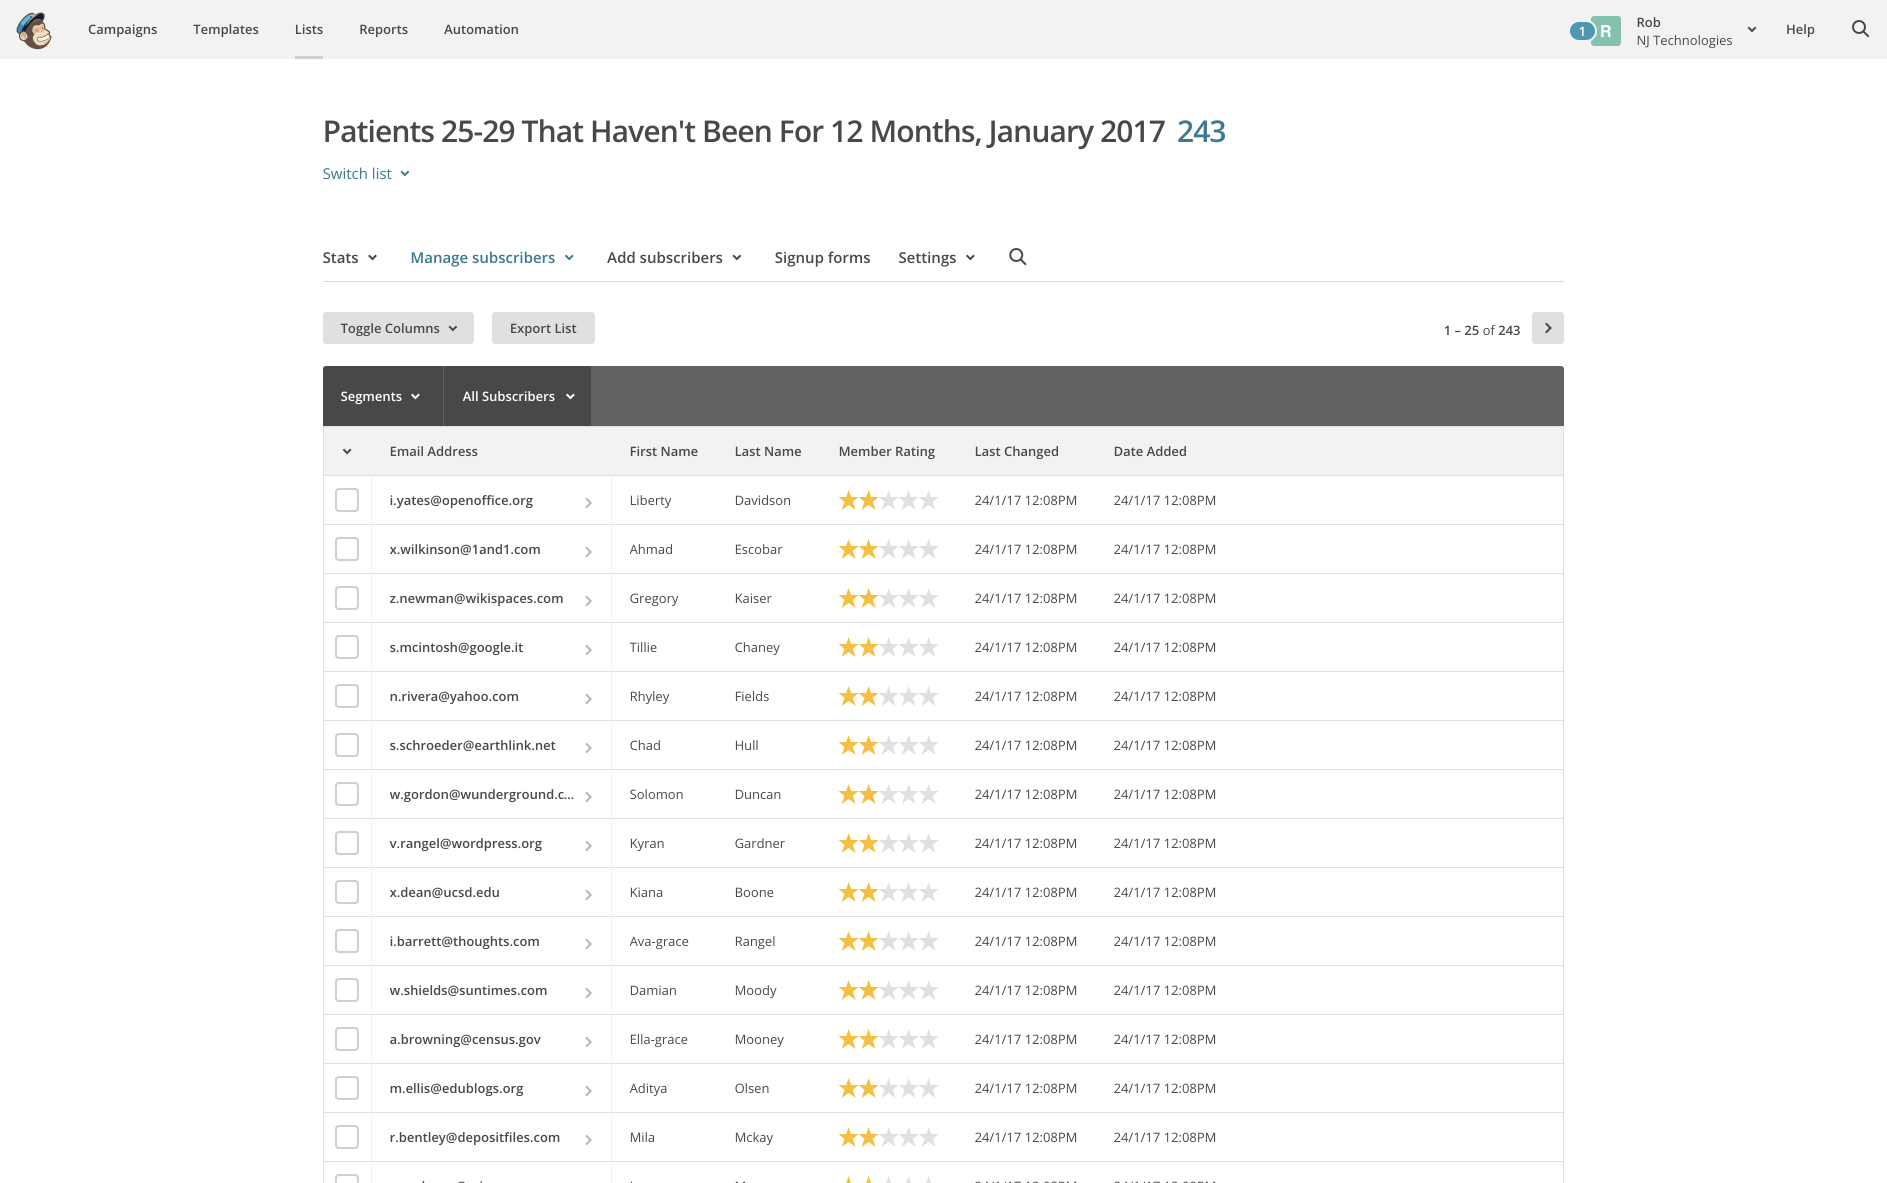
Signup or login in to you MailChimp account. Once logged in, click on the Lists tab of the navigation bar. In the lists section click on the button on the right to create a new list. Name the list 'Patients 25-29 that haven't been for 12 months, January 2017'. Fill out the rest of the details and create the list. Once created the list is now empty so we need to fill it with the list from Excel. Click on 'Import subscribers' then upload the .csv file we created in Excel. Once this is completed you should see all of your patients in the list.
Awesome job, Next up we need to create the email.
Create the Campaign
In MailChimp, click on the Campaigns button in the navigation bar, this view shows all previous campaigns you have run. Click the Create Campaign button. We will keep it simple so click on **Regular ol' Campaign' however when you are more experienced you can start running A\|B tests which I will cover in the future.
Recipients
Next we need to select the list of people the campaign will be sent to, click the segmented patient list we just created and select send to entire list, then click next in the bottom right.
Setup
In the set up of the campaign, you can leave most of the details with the default settings however we do need to fill in the campaign name and the email subject line. For this example we will call the campaign "Free Checkup promo, patients 25-29 that haven't been for 12 months, January 2017". The email subject will be something short to convey your offer like "We haven't seen you in ages, come see us at Dentally Dental for a free checkup". After you have filled out the details click next in the bottom right.
Template
The templates section is all about how you want to layout your email, this is really to your personal taste so have a play and see what you like the look of. I recommend keeping it simple and focused on your offer so for this example a single column layout will be perfect, or use one of the MailChimp templates.
Design
Once you have selected the template, MailChimp let's you design the content of your email by dragging and dropping different elements. You can very easily structure your email and fill in the text using MailChimp. Once again this is to your personal taste but what is extremely important is making the text relevant to the patient segment that we created. That was the whole point of doing that Excel work! The perfect text will find a point of empathy with the patient understanding why they would be interested in your offer. So for this busy segment of patients that have been neglecting their oral health we need to be relevant to them.
"Hey Julia, We know you're really busy but don't forget to look after your teeth we haven't seen you in a while. Why don't you schedule a quick check-up with us at Dentally Dental and we can do that for you for free. Look after your self -Ben".
Then after the text include your phone number for the patient to book an appointment or have a link straight to your website to book an appointment there. Links are good because you can see how often they have been clicked in the whole campaign. Once you are happy with the content, hit next.
Confirm and Send
In the confirm window you just confirm that you have filled out all the details that you need for your campaign once everything is in place you can hit send! That's it your first targeted campaign. I'm happy for you :D
Monitor
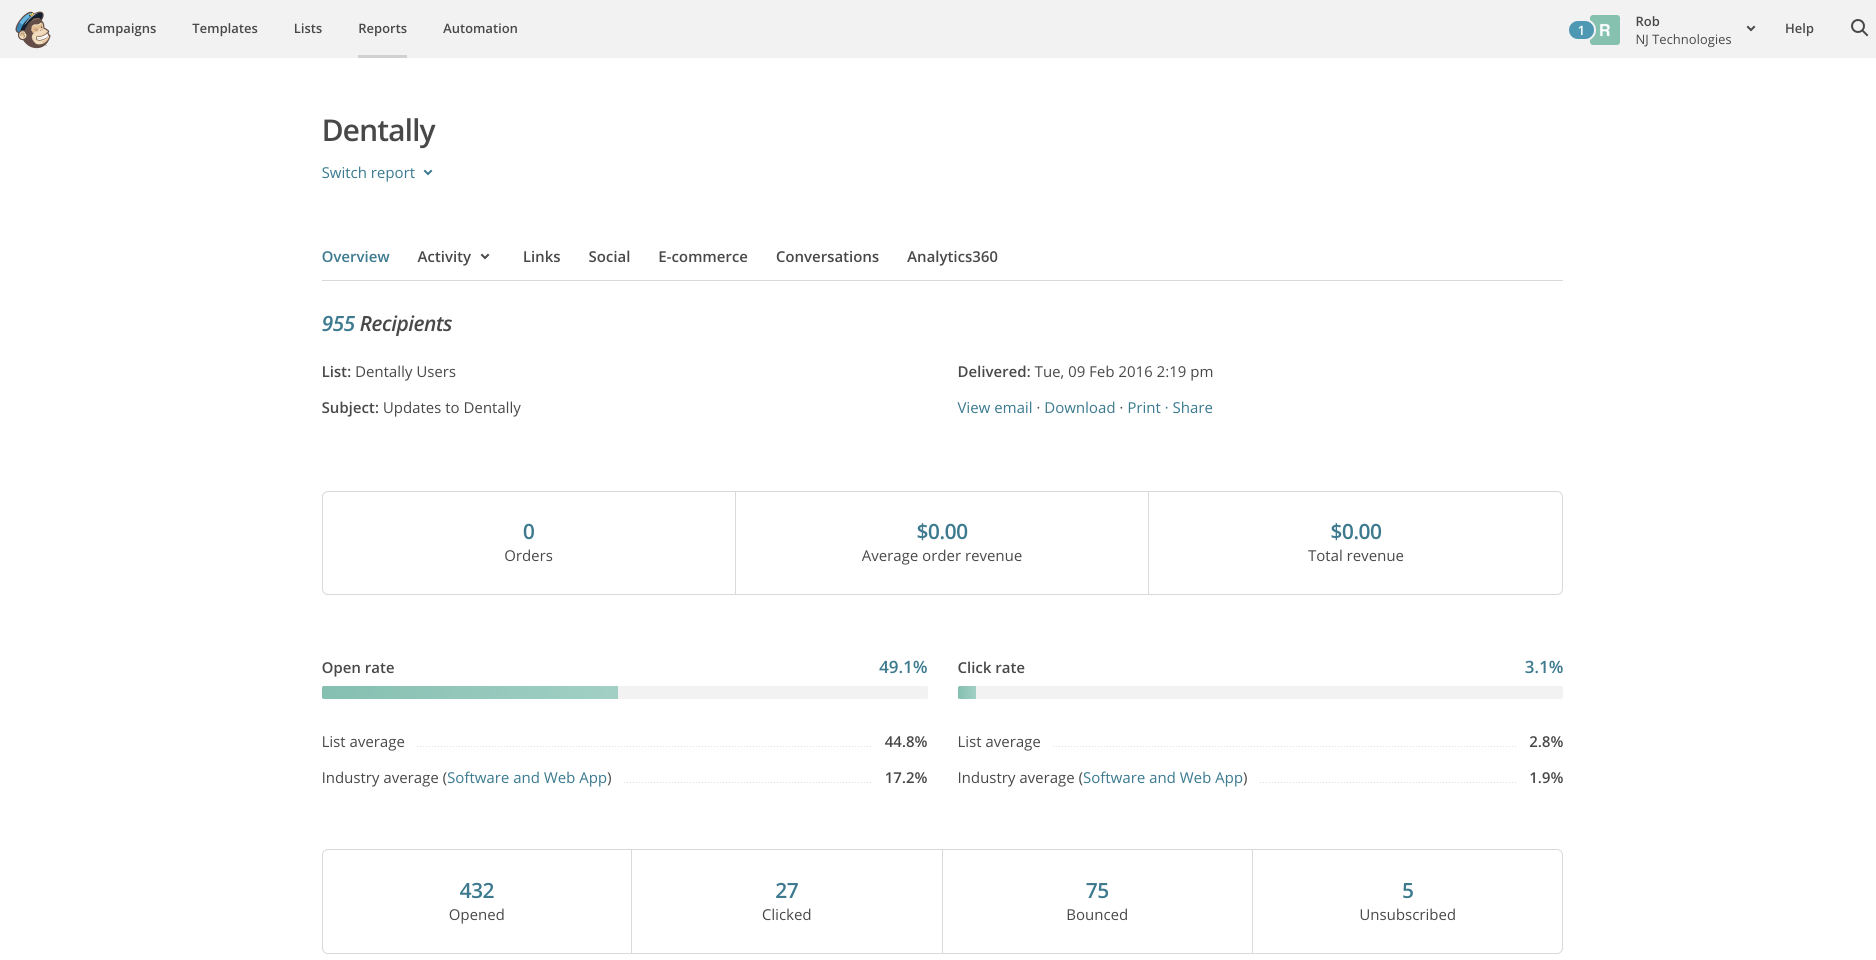
A couple of days after your campaign was sent it's time to look at the results. In MailChimp click on the Reports section in the top navigation bar. Scroll down and click on the name of the campaign that you ran. This page will show you the Open rate for your campaign. If your open rate is below 30% you will need to work on your email subject lines as they are not relevant enough for your patients to open the emails. You will also be able to see the Click rate which is the number of patients that clicked on a link (perhaps to your website) as a percentage of all the patients. Relevant emails will receive high open and click rates so these KPIs are important to monitor in your campaigns. Your first few campaigns may not go well but keep going, you will get the hang of writing relevant emails for your patient segments. Don't be afraid to experiment.
Don't be afraid to experiment with your segmentation and campaigns.
Summary
Well done for making it through the tutorial. You are now set up to send some amazing campaigns to your patients and you can be happy in the knowledge that you are promoting relevant services to your patients rather than spamming them.
During this tutorial we learnt how to define goals for our campaigns and then set criteria for how we want to segment our patients. We then exported a patient list from our dental software and refined that list in Excel. We imported that list into MailChimp where we created a beautiful email offer to send to our patients. After sending the email we learnt how to monitor the performance of a campaign by using the reports feature of MailChimp.
I know this was a long tutorial but this is essential knowledge in the world of email marketing, and because MailChimp is free and you already have the data this is FREE for you to do. If you need any advice on running your first segmented email campaign to your patients please drop me an email on ben@dentally.co and I would be happy to try and help. I am confident your practice will see huge gains by running new targeted campaigns and using patient segmentation to provide relevant offers.
If you want more great content like this straight to your inbox make sure you subscribe at the top of the page.
At Dentally we aim to make it easy for you to do things like patient segmentation why not request a trial to see how we do it.